Introduction
This guide explains how one can introduce a newborn or infant to a carrier using safe, calm techniques. It outlines each phase of the process, from preparation to extended wear, while highlighting why proper method matters for both parent and child. Readers will learn how to assess fit, secure straps, and maintain ergonomic posture, thereby reducing risk of hip dysplasia and back strain. The information is valuable because it combines clinical best practices with practical product recommendations.
What You'll Need
- One of the recommended carriers listed in the product section.
- A clean, flat surface for initial positioning.
- Soft blanket or nursing pillow for added support during the first attempts.
- Patience and a calm environment free from loud noises.
Step 1: Choose a Carrier That Matches Your Baby's Stage
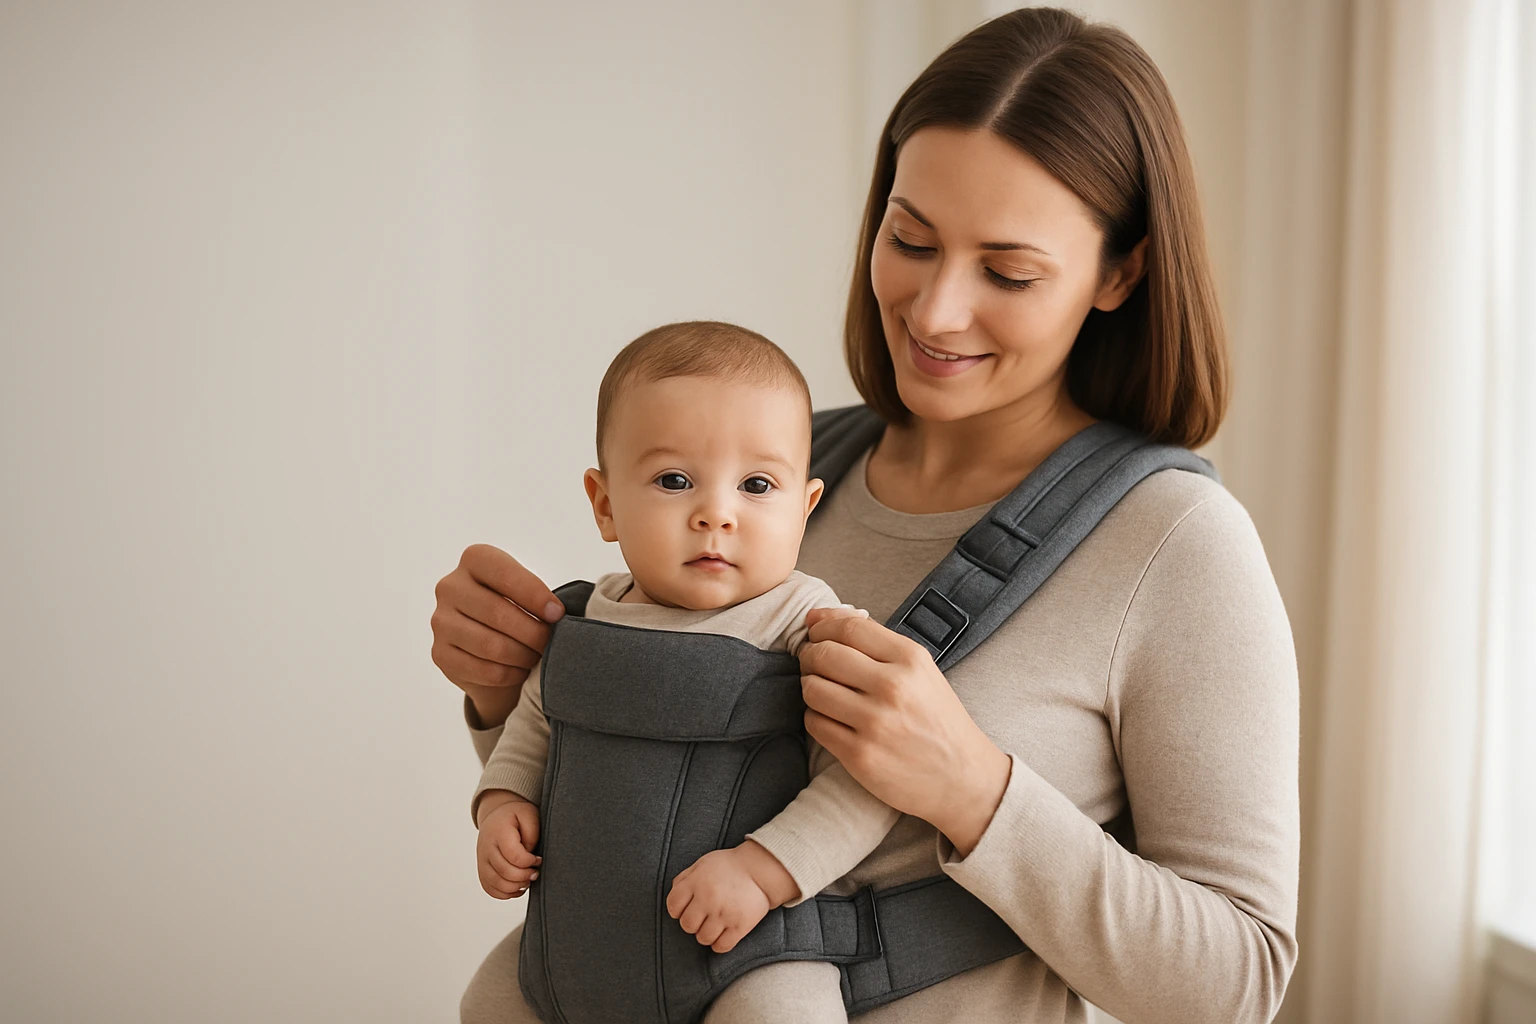
Begin by selecting a carrier designed for newborns and infants. The BabyBjörn Mini Carrier is ideal for the first months because it is small, soft, and easy to put on. It supports babies weighing 7‑15 lb and up to six months, offering a 3D mesh fabric that allows parents to see the baby's position. With a 4.7‑star rating from 1,148 reviews and a price of $119.27, it provides confidence in quality and safety. The carrier’s ergonomic design aligns the baby's hips in the natural “M” position, which the International Hip Dysplasia Institute recognises as hip‑healthy.
Choosing a carrier that fits the baby's size ensures proper spinal alignment and reduces the likelihood of overheating. The BabyBjörn Mini Carrier also features a front‑section that can be unfastened quickly, allowing parents to lift the sleeping baby without disturbing the carrier.
Step 2: Perform a Safety Inspection Before Each Use
Inspect the carrier for any signs of wear, broken stitching, or missing components. The LÍLLÉbaby Complete 6‑in‑1 Carrier includes a durable zip‑down front and reinforced side panels, making it a reliable choice for safety‑focused parents. Priced at $92.99 with a 4.5‑star rating from 6,778 reviews, it offers six ergonomic carry positions that can be adjusted as the child grows. The carrier’s lumbar support distributes weight across the lower back, reducing strain during longer wear.
When checking the carrier, verify that all buckles click securely, straps are free of fraying, and the fabric is clean. A thorough inspection prevents sudden failures that could jeopardise the baby's well‑being.
Step 3: Prepare the Environment and Position the Baby
Place a soft blanket on a flat surface and lay the carrier on top, face up. Gently position the baby on the carrier, ensuring the head is supported and the spine follows a natural C‑curve. The KeaBabies Baby Wrap excels in this step because its breathable D‑Lite fabric conforms to the baby's body, mimicking the womb environment. At $29.96 and a 4.6‑star rating from 1,623 reviews, it offers ergonomic weight redistribution and a cushioned back‑contouring panel for both parent and baby.
Position the baby so that the hips are spread‑apart, with the thighs supported and the knees higher than the bottom of the carrier. This posture promotes healthy hip development and provides a sense of security for the infant.
Step 4: Secure Straps and Adjust Fit
Fasten the carrier straps according to the manufacturer's instructions. For carriers with multiple adjustment points, such as the Koala Babycare Baby Wrap, use the two adjustable bands to achieve a snug yet comfortable fit. The Koala wrap costs $44.75, holds a 4.5‑star rating from 21,325 reviews, and includes a breathable backrest that unloads weight from the shoulders to the lumbar area.
Ensure that the straps are tightened enough to keep the baby close to the chest, but not so tight that breathing is restricted. The carrier should sit at the parent's center of gravity, allowing the elbows to rest naturally at the sides.
Step 5: Verify Comfort for Both Parent and Baby
After securing the carrier, stand upright and take a few steps. Check that the baby's chin is away from the chest, that the airway is clear, and that the carrier does not dig into the parent's shoulders. The LÍLLÉbaby Complete Carrier's lumbar support and side‑panel adjustments help maintain a neutral spine for the wearer, reducing fatigue during longer sessions.
If the baby appears fussy, reassess the fit: adjust strap length, reposition the baby, or add a soft blanket for extra cushioning. Comfort for both parties is essential for a calm experience.
Step 6: Begin with Short Sessions and Observe Reactions
Start with five‑minute intervals, gradually increasing the duration as both parent and baby become accustomed to the carrier. Use the BabyBjörn Mini Carrier for these brief sessions because its quick‑release front makes it easy to remove the baby if needed. Observe the baby's breathing, temperature, and signs of distress.
During the first few sessions, keep the environment quiet and maintain eye contact. This practice reinforces the bond and helps the baby associate the carrier with safety and warmth.
Step 7: Transition to Longer Wear and Diverse Positions
As confidence grows, extend wear time to 30‑45 minutes and explore different carrying positions, such as facing‑in, facing‑out, or hip‑carry. The LÍLLÉbaby Complete Carrier offers six positions, including backpack style for toddlers, allowing seamless transition as the child gains weight up to 45 lb.
When using the KeaBabies Wrap for outward‑facing positions, ensure the baby's head remains supported and that the wrap is evenly distributed across the parent's torso. Regularly check that the carrier remains snug and that the baby’s hips stay in the ergonomic “M” shape.
Tips & Pro Tips
- Always perform a final safety check before each use.
- Keep the carrier clean according to the manufacturer's washing instructions to prevent skin irritation.
- Use a mirror to verify that the baby’s airway is unobstructed while you are wearing the carrier.
- Practice the steps while the baby is awake and calm; attempting to secure a fussy infant can increase the risk of error.
- Consider using a nursing pillow during the initial positioning to provide additional support.
Troubleshooting
- Straps feel too tight: Loosen the adjustment points gradually; the carrier should sit close to the chest without restricting breathing.
- Baby slides down: Ensure the hips are spread‑apart and the thigh support is engaged; reposition the baby and re‑tighten the straps.
- Back pain for the wearer: Activate lumbar support on the LÍLLÉbaby Complete Carrier or shift weight distribution using the Koala wrap's backrest.
Conclusion
This guide has outlined a systematic, safe approach to introducing a newborn or infant to a carrier. By selecting an appropriate carrier, performing safety checks, positioning the baby correctly, and gradually extending wear time, parents can foster a secure bond while maintaining ergonomic health. The recommended products—BabyBjörn Mini Carrier, LÍLLÉbaby Complete 6‑in‑1, KeaBabies Baby Wrap, and Koala Babycare Wrap—provide reliable tools that simplify each step. Continued practice will build confidence, allowing families to enjoy the convenience and closeness that babywearing offers.
Products Mentioned in This Guide
Frequently Asked Questions
How do I safely introduce my newborn to a carrier?
Start on a flat surface, use a soft blanket for support, and gently position the baby while keeping the carrier snug but not too tight.
What signs indicate the carrier fits my baby correctly?
The baby's hips should form a natural 'M' shape, the straps should be snug without restricting breathing, and the baby should feel secure and comfortable.
Why is a newborn‑specific carrier important for hip health?
Newborn carriers provide proper hip positioning that helps prevent hip dysplasia by keeping the thighs spread and the knees higher than the buttocks.
How long can I wear my baby in a carrier during the first weeks?
Begin with short sessions of 10‑15 minutes and gradually increase as both you and the baby become comfortable, never exceeding 2‑3 hours total per day.
What should I do to keep the carrier clean and safe for my infant?
Follow the manufacturer’s washing instructions, regularly inspect straps for wear, and ensure the fabric stays free of debris and odors before each use.