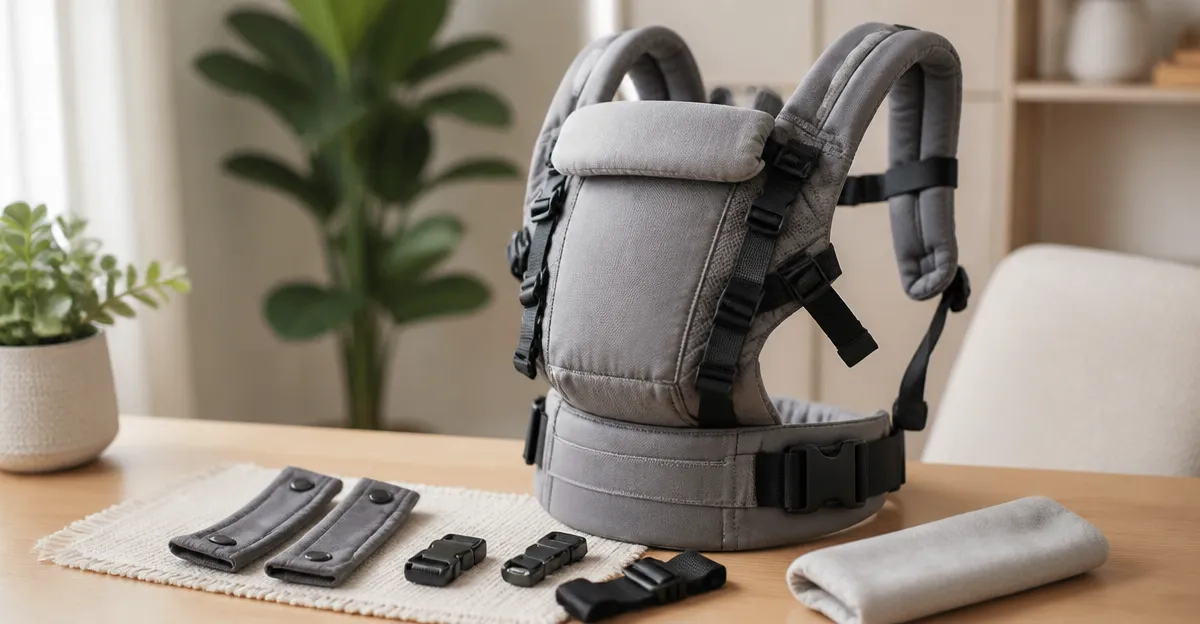
How to Modify Your Baby Carrier for Low Hand Grip Strength: Simple DIY Adjustments for Parents with Weak Hands
Introduction
Parents with reduced hand grip strength often find traditional baby carriers challenging to secure and adjust. This guide explains how to adapt common carriers using inexpensive tools and ergonomic techniques. Readers will learn how to identify problematic straps, add assistive accessories, and test the carrier for safe, comfortable use. The information is valuable because it empowers caregivers to maintain hands‑free parenting without compromising safety or comfort, and it reduces reliance on external assistance.
The adjustments described are compatible with most mainstream carriers, but specific product examples are provided to illustrate the most effective solutions. By following the step‑by‑step instructions, one can transform a standard carrier into a low‑effort, high‑support device suitable for daily outings, errands, and travel.
What You'll Need
- Adjustable strap extenders or elastic cord (available at craft stores)
- Velcro® fasteners or fabric loops
- Soft padding material (e.g., foam or fleece)
- Scissors, needle, and thread (or a fabric glue for no‑sew options)
- One of the recommended carriers for reference and comparison
Step 1: Evaluate the Carrier and Identify Grip‑Intensive Areas
Begin by laying the carrier flat on a clean surface. Examine each strap, buckle, and the waist belt. Identify where you must pull, twist, or tighten with a firm grip. Common trouble spots include the shoulder‑strap buckles, the waist‑belt cinch, and the carrier's front‑facing loop. Mark these areas with a piece of chalk or a small sticker.
During this assessment, consider the Infantino Flip 4-in-1 Baby Carrier (Gray). Its padded shoulder straps and wide waist belt already reduce strain, making it an excellent baseline carrier for modification. The carrier supports newborns to toddlers (8‑32 lb), has a 4.6‑star rating from over 82,000 reviews, and costs $29.15.
Understanding the carrier's existing ergonomic features helps you decide where additional assistance is truly needed, rather than duplicating built‑in support.
Step 2: Add Strap Extenders to Reduce Pulling Force
Strap extenders increase the lever arm of a buckle, meaning you need less hand strength to tighten it. Cut two pieces of elastic cord about 12 inches long. Thread each piece through the existing shoulder‑strap loops, then knot securely. The elastic will stretch slightly when you pull, allowing the buckle to close with minimal effort.
If you prefer a ready‑made solution, the Infantino Flip 4-in-1 Baby Carrier (Gray) already features adjustable straps that can accommodate extenders without compromising fit. The carrier's ergonomic design distributes weight across the hips and lower back, so adding extenders does not alter its balance.
Test the modified straps by pulling them slowly. The elastic should give way smoothly, and the buckle should snap closed with a gentle tug. If the cord feels too loose, trim a few centimeters and retest.
Step 3: Incorporate Velcro® Fasteners for Quick Adjustments
Velcro® offers a low‑force alternative to traditional buckles. Cut two 4‑inch strips of hook‑and‑loop tape. Sew or fabric‑glue one side onto the interior of the waist belt, and the matching side onto the carrier's front loop. This creates a quick‑release mechanism that can be tightened with a light pull rather than a tight squeeze.
The Mockpose Pure Cotton Baby Carrier exemplifies a skin‑friendly, lightweight design that benefits from additional Velcro support. It is made of 100 % pure cotton, supports babies 7‑40 lb, and holds a 4.8‑star rating from 133 reviewers at $44.99. Its breathable fabric makes it easy to sew Velcro onto without damaging the material.
After attaching the Velcro, tighten the waist belt by pulling the carrier snug against your body, then press the Velcro together. The connection should feel secure yet release with a gentle tug, ideal for parents with limited grip strength.
Step 4: Enhance Padding on the Waist Belt for Comfort and Leverage
Additional padding can spread the carrier's weight more evenly, reducing the need for a tight grip when cinching the belt. Cut a piece of soft foam or fleece to match the width of the waist belt. Use a strong fabric adhesive to attach the padding to the interior side of the belt, ensuring it does not shift during use.
The Infantino Flip 4-in-1 Baby Carrier (Black) offers the same ergonomic features as the gray version, including a wide waist belt that already supports the lower back. Priced at $29.15 and rated 4.6 stars, it serves as a reliable reference for how padding improves comfort. Adding a thin layer of foam to this belt can further decrease the force required to secure the carrier.
Once the padding is set, re‑wrap the belt around your hips and fasten using the Velcro or the original buckle. You should notice a reduction in pressure on the hips and a smoother cinching motion.
Step 5: Test the Modified Carrier with a Weighted Substitute
Before placing your baby in the carrier, simulate the load using a weighted backpack or a bag of rice that matches your child's weight. Wear the carrier as you normally would, and practice the adjusted strap and belt mechanisms. Observe whether the modifications allow you to tighten and release the carrier with a gentle pull.
If any component feels loose, revisit the previous steps: tighten Velcro, adjust elastic length, or add more padding. Safety is paramount; ensure all stitches or glue bonds are secure and that the carrier maintains its original weight‑distribution profile.
When the test is successful, transition to using the carrier with your baby, monitoring for any signs of discomfort in both the child and yourself. Adjust as needed during the first few uses.
Tips & Pro Tips
- Use color‑coded elastic cords so you can quickly identify left‑ and right‑side extensions.
- Choose Velcro® with a strong adhesive backing to avoid repeated re‑application.
- When adding padding, keep the total thickness under 0.5 inches to prevent the belt from becoming too bulky.
- Store spare elastic and Velcro strips in a small zip‑lock bag attached to the carrier for on‑the‑go adjustments.
- For postpartum parents, perform modifications while seated to reduce strain on the back.
Troubleshooting
| Problem | Possible Cause | Solution |
|---|---|---|
| Strap extenders slip off | Elastic cord not knotted securely | Retie the knot using a double‑knot technique; apply a small dab of fabric glue for extra hold. |
| Velcro does not stay closed | Insufficient surface area or low‑quality tape | Replace with industrial‑strength Velcro; increase strip length to 6 inches. |
| Padding shifts during use | Adhesive failure | Use a high‑bond fabric glue; allow 24 hours to cure before first use. |
| Carrier feels too loose after modifications | Over‑extension of straps | Shorten elastic extensions or tighten original buckles to restore proper tension. |
Conclusion
Modifying a baby carrier for low hand grip strength does not require specialized equipment—simple elastic cords, Velcro® fasteners, and extra padding are sufficient. By following the five steps outlined, parents can reduce the force needed to secure straps, improve comfort, and maintain the carrier's safety standards. The recommended carriers—Infantino Flip 4‑in‑1 (Gray and Black) and Mockpose Pure Cotton Baby Carrier—illustrate how existing ergonomic designs complement DIY enhancements. With these adjustments, caregivers can enjoy hands‑free parenting confidently, even when hand strength is limited.
Products Mentioned in This Guide
Frequently Asked Questions
What simple modifications can make a baby carrier easier to fasten for parents with weak hand grip?
Add strap extenders or elastic cords and Velcro® fasteners so straps can be tightened with minimal pulling.
Can I use everyday household items to adapt my baby carrier?
Yes, elastic hair ties, fabric loops, and small foam pads work well as low‑cost assistive accessories.
How do I ensure safety after modifying a carrier?
Test the carrier by checking strap tension, weight distribution, and that all added components stay securely in place before each use.
Are these adjustments compatible with most major baby carrier brands?
The DIY tips are designed for common strap‑based carriers and can be applied to most mainstream models.
What is the best way to add padding without affecting the carrier’s fit?
Sew or clip thin foam pads onto the shoulder straps or waist belt, keeping them thin enough to maintain the carrier’s original shape.