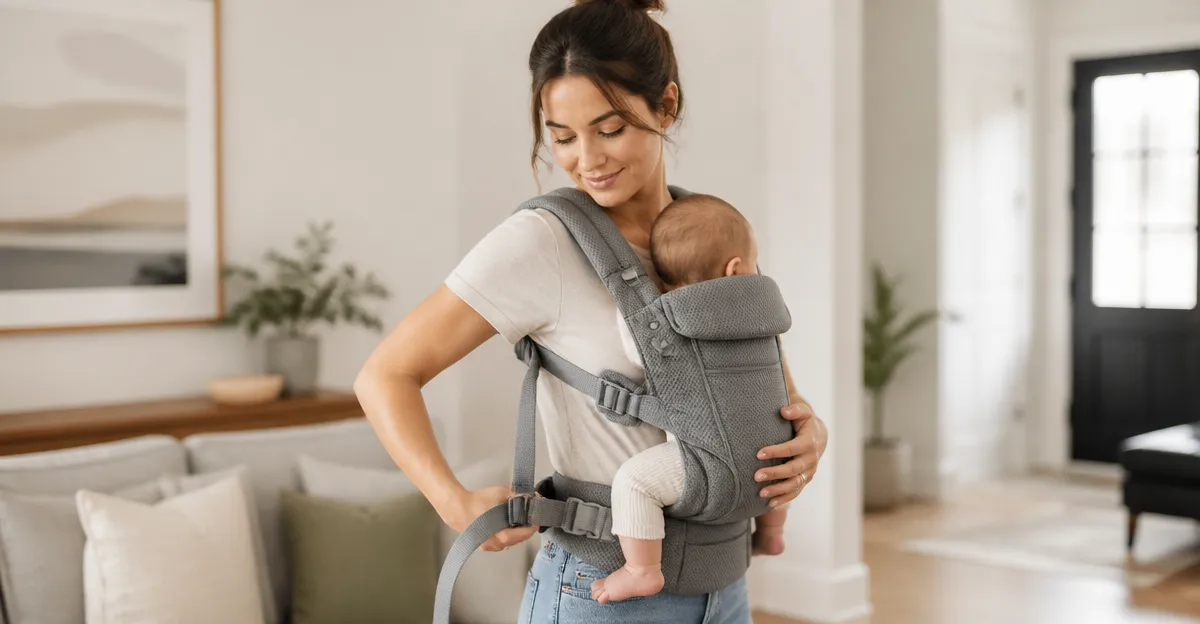
How to Put On a Baby Carrier One‑Handed (With Baby in Your Arms): Step‑by‑Step Safe Method for Busy Parents
Introduction
Parents often find themselves juggling a diaper bag, a grocery basket, and a smiling infant. In such moments, the ability to secure a baby carrier with a single hand can prevent strain and maintain safety. This guide explains the precise motions, body mechanics, and product features that enable a busy caregiver to place a carrier on a baby while keeping the child in the arms. By following the outlined steps, one will reduce the risk of accidental release, protect the baby’s hips, and preserve the caregiver’s posture.
The method presented works with a variety of carriers, yet certain designs simplify the one‑handed process. Understanding why those designs matter will help the reader select the most appropriate tool for their routine.
What You’ll Need
- A baby carrier with quick‑release buckles or a self‑tie wrap that can be pre‑positioned.
- A flat, stable surface for the carrier if it requires unfolding.
- A clean, distraction‑free environment to focus on safety.
- Optional: a small towel or mat to protect clothing while adjusting straps.
Below are product recommendations that align with the requirements of this method.
Step 1: Choose a Carrier with One‑Handed Fastening
Select a carrier that incorporates a dual‑action locking buckle and an elastic safety band. The Ergobaby Alta Hip Seat Carrier offers exactly these features. It includes a large storage pocket, a sun hood for privacy, and a removable back panel that converts to a hip seat. Priced at $126.99 with a 4.5‑star rating from 264 reviews, the carrier is praised for its ergonomic seat and quick‑click buckles, which are essential for a one‑handed operation.
The carrier’s one‑click waistband allows the caregiver to slide the buckle into place while holding the baby against the chest. The elastic safety band automatically locks around the torso, eliminating the need for a second hand to tighten a strap. This design reduces the time spent fumbling with multiple adjustments.
If a softer, fabric‑only option is preferred, the KeaBabies Wrap Carrier can be pre‑tied into a secure knot before the baby is positioned. At $28.96 and a 4.5‑star rating from 28,536 reviews, the wrap distributes weight evenly and stays in place without constant readjustment.
Step 2: Prepare the Carrier While Holding the Baby
With the infant cradled against the chest, open the carrier on the opposite side of the body. For structured carriers such as the Ergobaby Alta, lay the waist belt across the hips and pull the buckle toward the front. The large storage pocket can hold a diaper or phone, keeping the caregiver’s other hand free.
For the KeaBabies Wrap, spread the fabric over the shoulder and back, then locate the pre‑tied knot. The wrap’s breathable mesh ensures the caregiver does not overheat while maneuvering the fabric around the baby.
Position the carrier so that the main strap or panel rests against the caregiver’s torso. This orientation allows the carrier to slide into place with a single pulling motion.
Step 3: Slide the Carrier Onto the Baby’s Hips
Gently lower the baby’s legs into the carrier’s seat or pouch while maintaining a firm hold on the infant’s torso. The Ergobaby Alta features a curved, cushioned seat that supports healthy hip positioning, a requirement endorsed by the International Hip Dysplasia Institute. As the baby’s thighs settle into the seat, the caregiver can use the free hand to pull the waist buckle upward, locking the carrier with one swift motion.
If using the Tushbaby Hip Seat Carrier, the structured seat without foam offers firm support and a built‑in lumbar pad for the caregiver. Priced at $84.99 with a 4.6‑star rating from 5,806 reviews, the Tushbaby’s quick‑release buckles and wide waistband enable a one‑handed slide‑in while the baby remains cradled.
For the NEST BLANCHE Carrier, the X‑shaped back distributes weight evenly, and the padded shoulder straps stay in place without additional hand assistance. At $80.99 and a 4.6‑star rating from 584 reviews, the carrier’s adjustable straps can be pre‑set to the caregiver’s size, allowing a single pull to secure the carrier.
Step 4: Adjust Straps and Verify Hip‑Healthy Position
After the carrier is locked, use the free hand to tighten the waist strap just enough to eliminate slack. The Ergobaby Alta’s dual‑action buckle clicks into place and the elastic safety band provides a secondary lock, ensuring the carrier will not loosen during movement.
Check that the baby’s hips form a “M” shape, with knees higher than the bottom of the seat. This posture promotes healthy hip development and is a hallmark of the Ergobaby and KeaBabies designs, both certified by the International Hip Dysplasia Institute.
If the carrier includes a sun hood, such as the Ergobaby Alta, pull it over the baby’s head to shield from glare and provide nursing privacy. The hood’s breathable polyester mesh prevents overheating.
Step 5: Perform a Final Safety Check
Before walking away, verify that all buckles are fully engaged and that the carrier sits snugly against the caregiver’s body. The Tushbaby Hip Seat Carrier’s lumbar support should feel firm but not restrictive, indicating proper weight distribution.
Lift the baby slightly to ensure the carrier supports the weight without shifting. Listen for any unusual creaking sounds from buckles; a secure carrier will remain silent.
Finally, confirm that the baby’s chin is not pressed against the chest, which could impede breathing. A quick glance at the baby’s face should reveal a relaxed expression and steady breathing pattern.
Tips & Pro Tips
- Practice the one‑handed motion without a baby first; use a weighted pillow to simulate the infant’s mass.
- Keep the carrier’s straps pre‑adjusted to the caregiver’s body size to minimise on‑the‑spot tightening.
- Use the storage pocket for small items such as keys or a phone; this prevents the need for a second hand.
- When using a wrap, tie the knot low on the back to keep the fabric out of the baby’s face.
- Always double‑check the hip‑healthy “M” position; many carriers include visual markers on the seat.
Troubleshooting
| Problem | Solution |
|---|---|
| Carrier slips after a few minutes. | Re‑tighten the waist buckle and ensure the elastic safety band is engaged. Consider a carrier with a wider waistband such as the Ergobaby Alta. |
| Baby feels too warm. | Choose a carrier with breathable mesh panels. Both the Ergobaby Alta and KeaBabies Wrap use polyester mesh that promotes airflow. |
| One‑handed motion feels awkward. | Practice on a stable surface and pre‑position the carrier. The Tushbaby Hip Seat Carrier’s no‑foam design reduces bulk, making it easier to slide on. |
Conclusion
By mastering the one‑handed technique, busy parents can maintain safety, protect the baby’s developing hips, and preserve their own posture. The steps outlined combine ergonomic design, quick‑release hardware, and practical adjustments. Whether selecting the premium Ergobaby Alta, the budget‑friendly KeaBabies Wrap, the supportive Tushbaby Hip Seat Carrier, or the stylish NEST BLANCHE Carrier, each tool enhances the efficiency of the process while meeting rigorous safety standards.
Implement the method consistently, and the caregiver will experience greater confidence during daily errands, grocery trips, and spontaneous adventures.
Products Mentioned in This Guide
Frequently Asked Questions
How can I put a baby carrier on with one hand while holding my infant?
Place the carrier on a stable surface, slide the baby into the front pocket, then use the quick‑release buckles to secure it with your free hand.
What carrier features make one‑handed use easier?
Quick‑release buckles, pre‑positioned straps, and self‑tie wraps that stay open simplify one‑handed application.
Is it safe to use a one‑handed method for newborns?
Yes, as long as the carrier provides proper hip support and the buckles are fully engaged before lifting the baby.
Do I need any extra equipment to protect my clothing while adjusting the carrier?
A small towel or mat can be placed underneath to keep clothes clean while you tighten straps.
Can I use this method on any type of baby carrier?
It works best with carriers that have quick‑release buckles or wraps that can be pre‑positioned, though most ergonomic carriers are compatible.